
What is Virtual Private Network Server?
VPN is Virtual Private Network. VPNs are used to connect securely over another network and is also used to gain access to region-based websites and applications.
There are many Free VPN Extensions available for browser but they provide limited resources. There are many paid VPN providers in the market which provide good quality VPN servers for professional users.
However, personal VPN is increasingly becoming more popular as more interactions that were previously face-to-face transition to the Internet. Virtual Private Network increases the user’s privacy by replacing the initial IP address to the IP address of Virtual Private Network. Security Analyst uses VPN to Encrypt the data transfers and Mask their location by changing IP addresses.
To create your personal virtual private network server you will need a VPS server. You can get a VPS from just $1/month at VirMach.
Watch our video and follow steps to create your personal VPN server easily.
Server Requirement:
- 256mb ram
- 5gb Disk Space
- Ubuntu, CentOS or Fedora
Buy Your VPS/Cloud server
I will be using DigitalOcean 5$ Cloud server for the tutorial. If you want to buy a VPS server in just 1$ visit VirMach.com. VirMach provides a 256mb ram server at 1$.
Install OpenVPN script to VPS server
Login to SSH of your server and add the following command.
wget https://git.io/vpn -O openvpn-install.sh && bash openvpn-install.shscript credit: https://github.com/Nyr
After running the above commands it will show several prompts in which we have to select options accordingly.
Welcome to this OpenVPN road warrior installer!

Which IPv4 address should be used?
     1) 68.183.80.142
     2) 10.47.0.5
IPv4 address [1]: 1
Select the VPS IP address and press enter.
Which protocol should OpenVPN use?
   1) UDP (recommended)
   2) TCP
Protocol [1]: 1
Select UDP as a protocol because UDP is a connectionless protocol it will provide you the best speed to you.
What port should OpenVPN listen to?
Port [1194]: 1194
type port I will use default port 1194
Select a DNS server for the clients:
   1) Current system resolvers
   2) Google
   3) 1.1.1.1
   4) OpenDNS
   5) Quad9
   6) AdGuard
DNS server [1]: 1
Select Current System Resolvers for better performance.
Enter a name for the first client:
Name [client]: myprivate
Enter the client name you want to create for OpenVPN.
OpenVPN installation is ready to begin.
Press any key to continue...
Enter any key to continue the installation.
Finished!
The client configuration is available in: /root/myprivate.ovpn
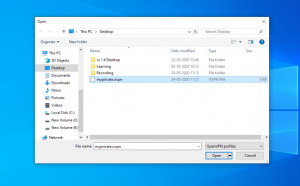
New clients can be added by running this script again.The client configuration file myprivate.ovpn is now created in /root directory import that file in your computer/laptop/mobile.
Download openVPN Connect Import the myprivate.ovpn file in app and connect to VPN.
Refer below images or check our video of installation for easy understanding.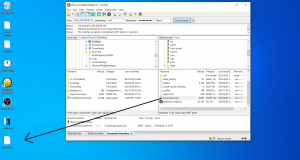

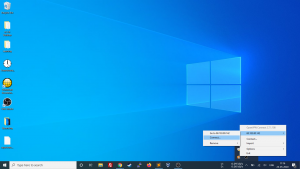

After this You will be connected to your VPN server 🙂 enjoy private networking xD